How to run Xfce on EC2 #
Problem #
- You need a globally reachable Linux machine which runs a desktop environment.
- You want to be able to access this machine from the Internet.
Solution #
- Rent a headless Virtual Machine with AWS, Azure or another cloud provider which can provision a public IP address for the machine.
- Install Xfce on the Virtual Machine.
- Use Remote Desktop to connect to the Xfce Desktop Environment on the machine.
Steps #
- Create an EC2 instance
Follow these
instructions to create an EC2 instance. The default user name is ubuntu
- Login via SSH
Get the public IP of the EC2 instance and
log in with user ubuntu
- Update Package List
sudo apt-get update
- Set a password for the
ubuntuuser
sudo passwd ubuntu
- Install Xfce and Remote Desktop
The following command installs essential Xfce and Remote Desktop packages. Note: This will install a few hundreds of dependency packages
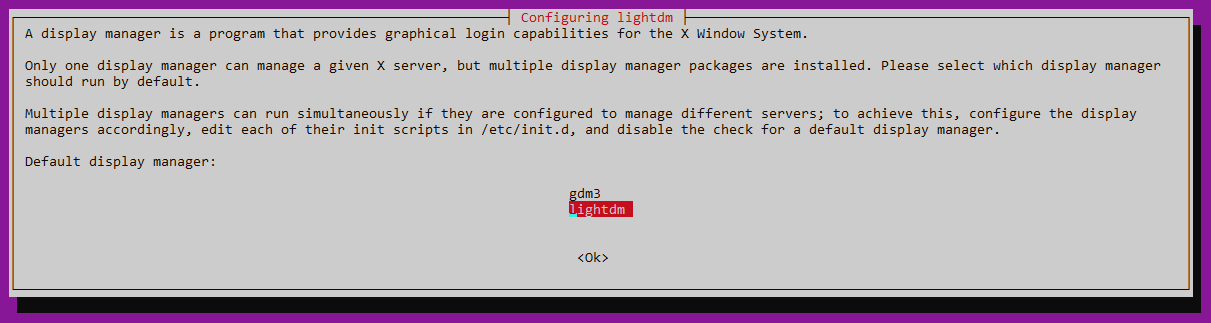
sudo apt-get install xfce4 xfce4-goodies xfce4-terminal xrdp
During the installation you will need to set the default display manager to lightdm
- Configure XServer
Make Xfce the default display manager for the ubuntu user and restart the machine
echo "startxfce4" > ~/.xsession
sudo shutdown -r now
- Port Forwarding to Remote Desktop
Repeat step 2 to log into the EC2 and additionally forward an arbitrary local port (2000 below) to the remote desktop port 3389.
Note: The following command works with the OpenSSH syntax. Switch -N does not open a remote shell but only forwards the port (See more info
here).
ssh ubuntu@<server-ip|FQDN> -i <private-pem-key-file> -L 2000:127.0.0.1:3389 -N
- Connect to Remote Desktop (from Windows)
Start the Remote Desktop application. As remote address provide the local endpoint of the SSH tunnel.
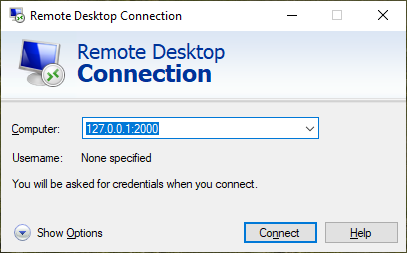
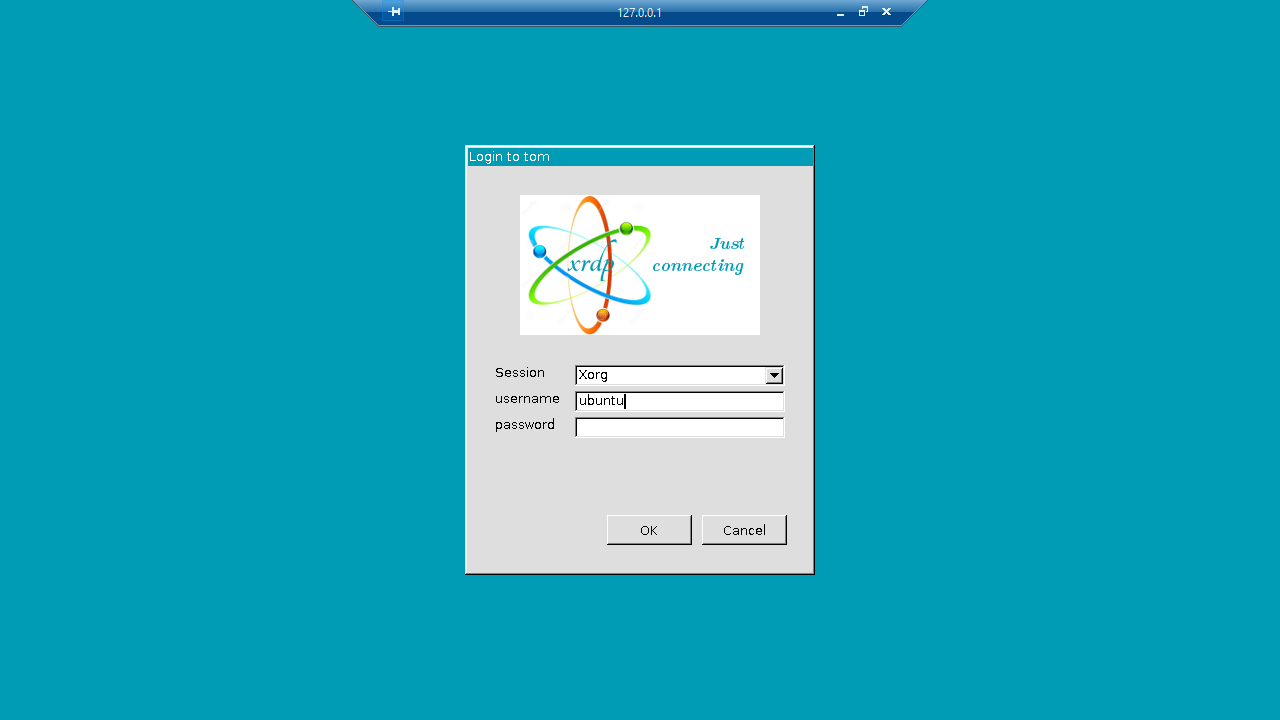
Click “Connect” and provide your username (default is ubuntu) and password (as set in step 4) in the login dialog.
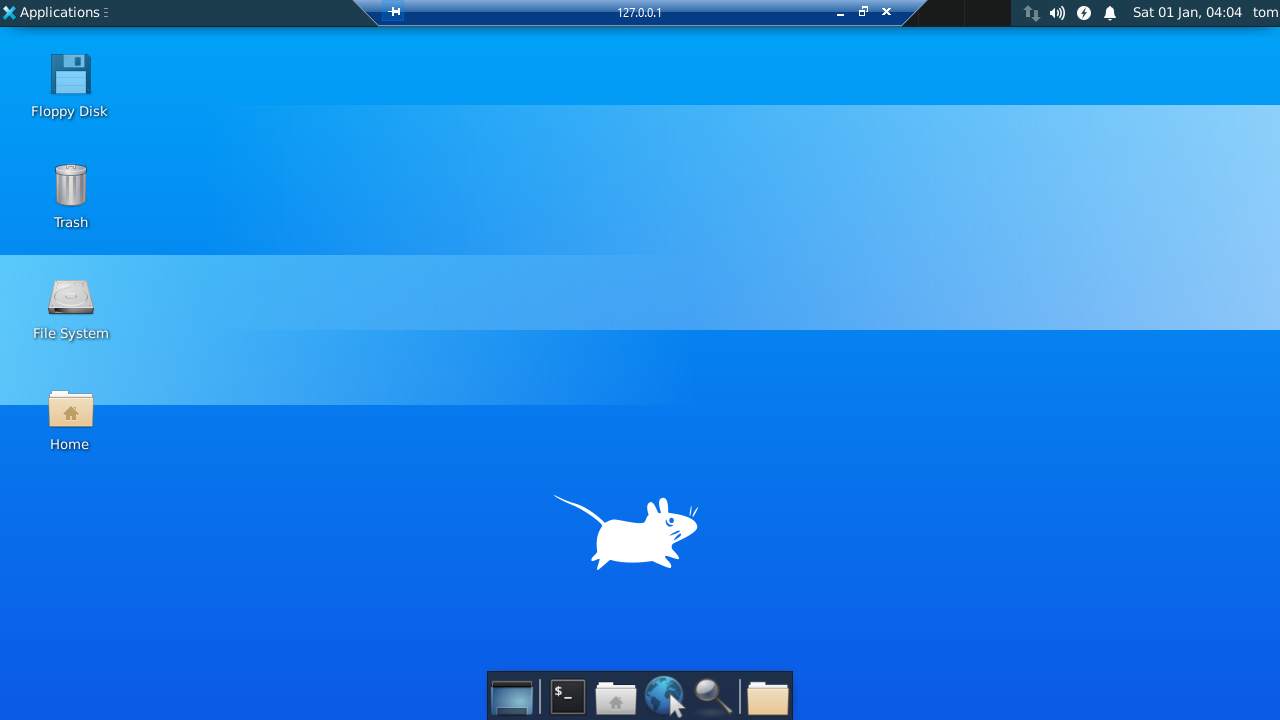
If all works well, you should see a desktop with a few desktop icons, a launcher at the bottom and menu bar at the top.